Easy File Upload logo

Easy File Upload plugin

Instant upload file and insert download link
Easy File Upload screenshot
Easy File Upload screenshotOverview screenshot
Easy File Upload logo

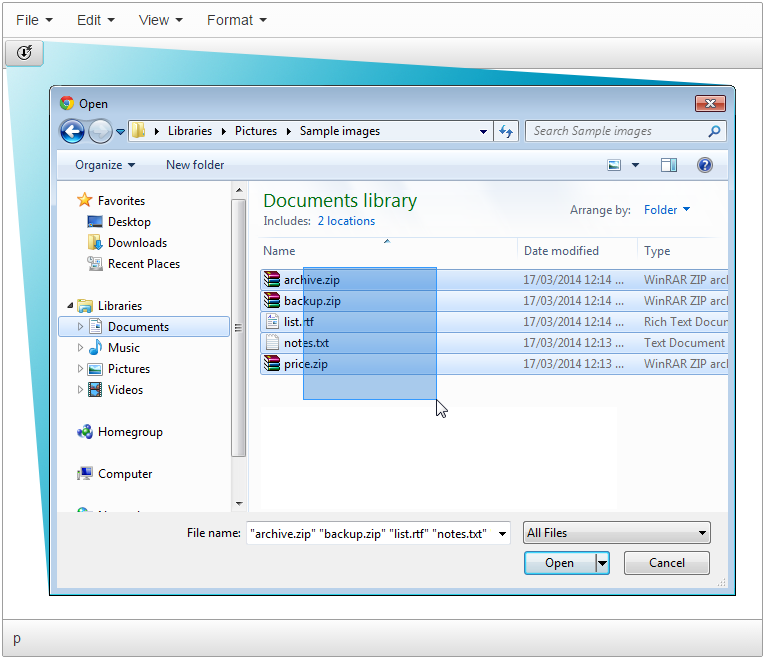
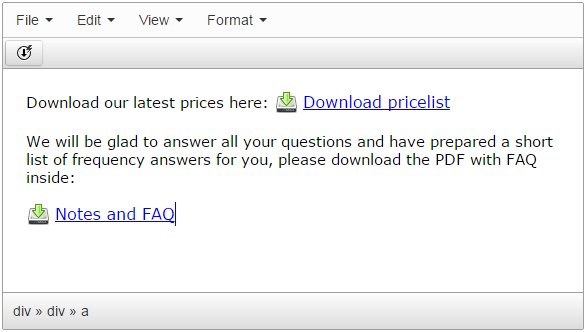
Just one click - and your files already uploaded into TinyMCE or CKEditor document. Such simple as never before: that's a power provided by TinyMCE Easy Image Upload add-on.

This plugin can work on PHP and ASP.NET servers, and can instantly upload selected files with inserting customizable template into the document. You can configure allowed files' extensions and maximum files' sizes.

CKEditor 4 logo CKEditor 4
TinyMCE 6 logo TinyMCE 6
TinyMCE 5 logo TinyMCE 5
TinyMCE 4 logo TinyMCE 4

Install Easy File Upload plugin in CKEditor 4

Download Easy File Upload
ZIP archive of Easy File Upload for CKEditor 4

Then do these simple steps:

  1. Copy EasyFileUpload directory to ckeditor/plugins/.
  2. Edit CKEditor config and add EasyFileUpload to extraPlugins parameter.

All the buttons this plugin will add to your toolbar automatically.

Using config file
Using initialization script

Example of configuring with config.js

If you prefer to edit config.js config file of CKEditor or when your CKEditor initialization code is placed inside some non-editable part of CMS, make these changes there:

CKEDITOR.editorConfig = function(config) {
    config.extraPlugins = "EasyFileUpload";
};

Example of configuring inside initialization code

Some CMSs do not use config.js file and let to edit CKEditor initialization script only. Do this changes there:

CKEDITOR.replace("#editor", {
    extraPlugins: "EasyFileUpload",
});

Install Easy File Upload plugin in TinyMCE 6

Download Easy File Upload
ZIP archive of Easy File Upload for TinyMCE 6
Self-hosted TinyMCE 6
Cloud TinyMCE 6

Install the plugin to TinyMCE 6 hosted on your server

  1. Copy EasyFileUpload directory to tinymce/plugins/.
  2. Edit TinyMCE config and add EasyFileUpload to plugins parameter.

All the buttons this plugin will add to your toolbar automatically.

Example

Here you can see sample TinyMCE initialization code with config inside it:

TinyMCE.init({
    selector: "#editor",
    plugins: "EasyFileUpload",
});

Refer to TinyMCE add-ons installation manual for more details

Install the plugin to cloud edition of TinyMCE 6

  1. Copy EasyFileUpload directory somewhere on your server where it can be accessible by a link.
  2. Specify the location of just copied Easy File Upload plugin adding key-value pair in external_plugins TinyMCE config parameter.
  3. Edit TinyMCE config and add EasyFileUpload to plugins parameter.

All the buttons this plugin will add to your toolbar automatically.

Example

Here you can see sample cloud TinyMCE initialization code with config inside it:

TinyMCE.init({
    selector: "#editor",
    plugins: "EasyFileUpload",
    external_plugins: {
        "EasyFileUpload": "http://example.com/public/EasyFileUpload/plugin.min.js",
    },
});

Refer to TinyMCE add-ons installation manual for more details

Install Easy File Upload plugin in TinyMCE 5

Download Easy File Upload
ZIP archive of Easy File Upload for TinyMCE 5
Self-hosted TinyMCE 5
Cloud TinyMCE 5

Install the plugin to TinyMCE 5 hosted on your server

  1. Copy EasyFileUpload directory to tinymce/plugins/.
  2. Edit TinyMCE config and add EasyFileUpload to plugins parameter.

All the buttons this plugin will add to your toolbar automatically.

Example

Here you can see sample TinyMCE initialization code with config inside it:

TinyMCE.init({
    selector: "#editor",
    plugins: "EasyFileUpload",
});

Refer to TinyMCE add-ons installation manual for more details

Install the plugin to cloud edition of TinyMCE 5

  1. Copy EasyFileUpload directory somewhere on your server where it can be accessible by a link.
  2. Specify the location of just copied Easy File Upload plugin adding key-value pair in external_plugins TinyMCE config parameter.
  3. Edit TinyMCE config and add EasyFileUpload to plugins parameter.

All the buttons this plugin will add to your toolbar automatically.

Example

Here you can see sample cloud TinyMCE initialization code with config inside it:

TinyMCE.init({
    selector: "#editor",
    plugins: "EasyFileUpload",
    external_plugins: {
        "EasyFileUpload": "http://example.com/public/EasyFileUpload/plugin.min.js",
    },
});

Refer to TinyMCE add-ons installation manual for more details

Install Easy File Upload plugin in TinyMCE 4

Download Easy File Upload
ZIP archive of Easy File Upload for TinyMCE 4

Then do these simple steps:

  1. Copy EasyFileUpload directory to tinymce/plugins/.
  2. Edit TinyMCE config and add EasyFileUpload to plugins parameter.

All the buttons this plugin will add to your toolbar automatically.

Example

Here you can see sample TinyMCE initialization code with config inside it:

TinyMCE.init({
    selector: "#editor",
    plugins: "EasyFileUpload",
});

Refer to TinyMCE add-ons installation manual for more details

Reviews

Be the first who will write a feedback for this plugin.

Tell a friend about Easy File Upload

Send