How to install
TinyMCE 6 is released!
There is a newer version of TinyMCE. Please read about the new version of TinyMCE using the links below.
TinyMCE 6 installation Upgrade manualTinyMCE 5 is a nice editor that replaces TinyMCE 4. It easily installs to your website and helps editing content.
Step-by-step TinyMCE 5 installation
To start working with TinyMCE 5, follow these 5 simple steps.
Download TinyMCE
Download the latest official build of TinyMCE. On this step you can connect add-ons and configure TinyMCE.
Connect TinyMCE to the page
Place the build into a public directory of your website and insert the following code onto your page (in <head> or in <body>) to connect TinyMCE.
<script src="tinymce/tinymce.min.js"></script>Initialize the editor
To make TinyMCE process your text box, include the initialization code to <body>.
For instance, if you want to connect TinyMCE to textarea:
<textarea id="editor">
    <h2>TinyMCE 5 editor</h2>
    <p>Edit this content with TinyMCE 5 editor installed</p>
</textarea>
Then your initialization code should be as follows:
<script>
    tinymce.init({
        selector: "#editor",
    });
</script>
Here, the value of the selector parameter is a CSS selector of the element you want to connect TinyMCE to. In this example, we locate it using the id attribute, so we start the value of the selector with #. If you want to locate a text box by its class, the value should be something like .classname.
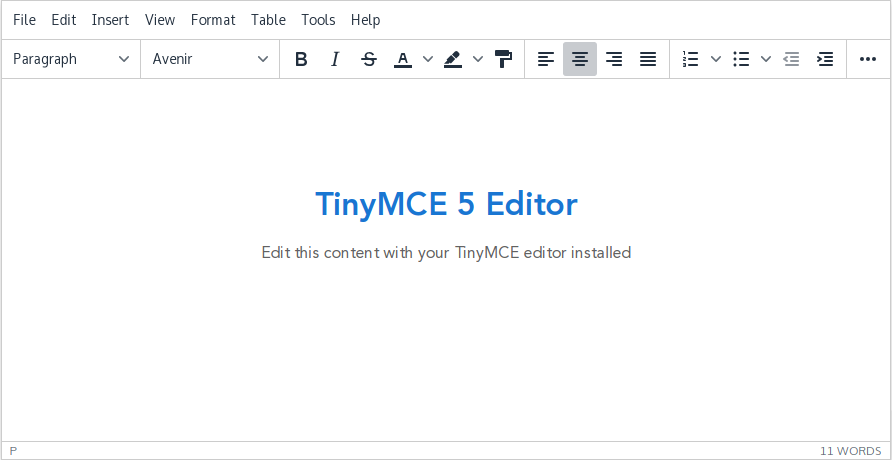
After successful install, you should see the editor on your page:

Configure the TinyMCE toolbar
It's time to configure your TinyMCE. If you used TinyMCE Builder on the first step, your toolbar is already configured. Nevertheless, you still can make manual changes to it.
Toolbar buttons are selected using the toolbar parameter:
tinymce.init({
    selector: "#editor",

    plugins: "link lists searchreplace fullscreen hr print preview " +
             "anchor code save emoticons directionality spellchecker",

    toolbar: "cut copy | undo redo | styleselect searchplace formatselect " +
             "link | fullscreen | bold italic underline strikethrough " +
             "| forecolor backcolor | removeformat | alignleft aligncenter " +
             "alignright alignjustify | bullist numlist outdent indent " +
             "| removeformat | blockquote hr anchor print spellchecker " +
             "| preview code save cancel | emoticons ltr rtl"

});
Here, as an example we list most of existing buttons available in the standard TinyMCE 5 package.
Please note that some buttons are in the TinyMCE core, while others are provided by standard TinyMCE add-ons. Put these add-ons to the plugins section to make them appear on the toolbar.
To fine tune TinyMCE toolbar, combine buttons from the list of buttons.
You can add plugins from the TinyMCE 5 add-on repository.
Example
We prepared an article with code examples on how to install TinyMCE and prepare it for work. TinyMCE 5 installation example.